
10 Creative Configurations for Raised Garden Beds in 2025
Imagine transforming your outdoor space into a vibrant, productive haven with raised garden beds. Creative configurations can make this dream a reality, offering solutions that are both practical and visually stunning. Elevated designs improve accessibility, making gardening easier for everyone. Unique shapes like tiered or hexagonal beds add visual appeal, while keyhole and curved configurations blend beautifully into your landscape. You can even maximize growing space by stacking vertically or using L-shaped beds in tricky corners. Whether you're exploring diy raised garden beds or looking for inexpensive raised garden bed ideas, these projects can fit any budget. With the right garden bed design, you’ll enjoy square-foot gardening like never before. Ready to dig in?
Key Takeaways
Tiered garden beds use space well and suit different plants. They are great for small yards.
Keyhole gardens mix composting and saving water. They are eco-friendly and simple to care for.
Vertical towers are good for small spaces. They cut down on weeds and pests and improve airflow.
U-shaped beds are easy to reach. You can care for plants without stepping on the soil, keeping them healthy.
Using different materials for garden beds makes them strong and stylish. You can create designs that match your needs.
Tiered Terraces for Raised Garden Beds

Benefits of Tiered Configurations
Tiered terraces are a fantastic way to add both functionality and visual appeal to your garden. This creative configuration allows you to grow a variety of plants in a compact space. By stacking layers, you can maximize your planting area without taking up too much ground. It’s perfect for small yards or urban spaces where every inch counts.
One of the biggest advantages of tiered raised garden beds is how they cater to different plant needs. Leafy green veggies and herbs thrive in the upper tiers, where they get plenty of sunlight. Meanwhile, tomatoes and deep-rooted plants do best in the lower tiers, where the soil stays moist longer. This setup not only makes your garden more productive but also keeps it organized and easy to maintain.
Tiered designs also make gardening more accessible. You won’t have to bend over as much, which is great for your back. Plus, the layered look adds a touch of elegance to your outdoor space. Whether you’re growing flowers, vegetables, or herbs, tiered terraces bring a unique charm to your garden.
How to Build Tiered Raised Garden Beds
Building raised beds in a tiered configuration is easier than you might think. Start by deciding how many tiers you want. Most diy raised garden bed projects use two or three levels, but you can customize it to fit your space.
Next, gather your materials. You’ll need wood, screws, and a drill. Cedar or redwood works well because they’re durable and resistant to rot. Cut the wood into different lengths for each tier, with the bottom tier being the largest. Assemble each box separately, then stack them to create the tiers. Secure them together with screws to keep everything stable.
Fill each tier with soil, starting with a base layer of organic material like sticks or leaves. This helps with drainage and reduces the amount of soil you need. Add compost and topsoil to create a nutrient-rich environment for your plants.
Finally, plan your planting. Use the upper tiers for herbs and greens, and save the lower levels for larger plants. This layout not only looks great but also ensures every plant gets what it needs to thrive. With a little effort, you’ll have a stunning and productive garden that’s both practical and inexpensive.
Keyhole Raised Garden Bed Ideas
Why Choose a Keyhole Design?
Keyhole raised garden beds are a brilliant choice if you’re looking for sustainable and efficient gardening ideas. This unique design combines functionality with eco-friendliness, making it perfect for both beginners and seasoned gardeners.
At the heart of a keyhole garden is its built-in composting system. This feature allows you to recycle organic waste, turning it into nutrient-rich compost that feeds your plants. It’s like having a mini ecosystem right in your backyard!
The composting basket in the center of the garden doubles as a reservoir for water, which is distributed evenly throughout the garden as it decomposes, reducing the need for frequent watering.
This design also helps you save water, which is especially useful in dry or arid regions. By catching and storing water, keyhole gardens maintain soil moisture levels, ensuring your plants thrive even in challenging conditions.
Benefit |
Description |
|---|---|
Sustainability |
The keyhole garden system is designed to be sustainable and lasts long, working in harmony with the environment. |
Built-in Nutrition System |
It has a built-in nutrition system that supports plant growth across seasons. |
Efficient Space Use |
The design allows for efficient use of space, reducing the area needed for paths and maintenance. |
Water Catchment |
The structure can be designed to catch and store water effectively. |
Composting in Place |
It aids in composting, enriching the soil naturally. |
Steps to Create a Keyhole Raised Garden Bed
Building a keyhole raised garden bed is a fun and rewarding diy project. Start by choosing a sunny spot in your yard. The circular design works well in small spaces, so you don’t need a huge area.
Create the Base: Mark out a circle, leaving a wedge-shaped section open for easy access. This wedge gives the garden its “keyhole” shape.
Build the Walls: Use inexpensive materials like bricks, stones, or wood to construct the outer wall. Aim for a height of about 2-3 feet to make it easy to work with.
Add the Compost Basket: Place a composting basket in the center of the circle. This will hold kitchen scraps and garden waste, turning them into compost over time.
Fill with Layers: Start with a base layer of sticks or straw for drainage. Add layers of soil, compost, and organic material to create a nutrient-rich environment.
Plant Your Garden: Arrange your plants around the compost basket. Use the outer edges for larger plants and the inner sections for smaller ones.
This design not only looks great but also makes gardening more efficient and sustainable. With a little effort, you’ll have a thriving garden that’s easy to maintain and environmentally friendly.
Vertical Towers for Small Spaces
Maximizing Space with Vertical Gardening
If you’re short on space but big on gardening dreams, vertical towers are the perfect solution. These raised garden bed ideas let you grow upwards instead of outwards, making them ideal for small balconies, patios, or urban backyards. By stacking plants vertically, you can create a lush, green oasis even in the tightest spaces.
Vertical gardening offers several advantages that make it a game-changer for urban gardeners:
Less weeding. You’ll spend less time pulling weeds, giving your plants more room to thrive.
Ample air flow. Better air circulation helps prevent plant diseases.
Fewer pests. Growing upwards keeps plants out of reach of many insects.
Easy to maintain and harvest. You can tend to your plants without bending or straining.
Many successful vertical gardening projects have transformed barren urban spaces into vibrant green areas. These gardens not only beautify cities but also increase plant diversity and provide fresh produce. With careful planning and maintenance, you can create your own vertical masterpiece that benefits both you and your community.
Tips for Building Vertical Raised Garden Beds
Building a vertical raised garden bed is easier than you might think. Start by choosing a sturdy frame. Materials like wood, metal, or even recycled items work well. Look for inexpensive options to keep costs down.
Next, decide on the structure. Stackable planters, hanging pots, or tiered shelves are great choices. Make sure the design suits your space and allows for proper drainage. If you’re into diy projects, you can repurpose old pallets or crates to build a unique vertical garden.
When filling your garden, use lightweight soil to avoid putting too much pressure on the structure. Add compost to enrich the soil and help your plants grow. Choose plants that thrive in vertical setups, like herbs, strawberries, or leafy greens.
Finally, place your vertical garden in a sunny spot. Regularly water and check for pests to keep your plants healthy. With these tips, you’ll have a thriving vertical garden that’s both practical and beautiful.
U-Shaped Raised Garden Beds
Advantages of U-Shaped Configurations
U-shaped raised garden beds are a game-changer for gardeners who want both functionality and style. This design offers a unique layout that makes gardening easier and more enjoyable. You can reach every part of the garden without stepping into the soil, which keeps your plants healthy and your garden looking neat.
One of the biggest perks of U-shaped configurations is their accessibility. You can sit in the middle and easily reach all three sides. This setup is especially helpful if you have mobility challenges or use a wheelchair. You won’t need to navigate around obstacles or strain to tend to your plants. Everything is within arm’s reach, making gardening a relaxing and stress-free activity.
U-shaped beds also maximize your planting space. The design creates more growing area compared to traditional rectangular beds. You can grow a variety of plants, from vegetables to flowers, all in one compact space. Plus, the shape adds a modern and organized look to your garden. Whether you’re working on small diy projects or planning a larger garden, this configuration fits perfectly.
Designing a U-Shaped Raised Garden Bed
Creating a U-shaped raised garden bed is simpler than it looks. Start by choosing a location with plenty of sunlight. Measure the space to ensure your bed fits comfortably while leaving enough room for you to move around.
For materials, wood is a popular choice because it’s sturdy and inexpensive. Cedar or redwood works best since they resist rot. Build the outer frame in a U-shape, leaving an open section in the middle for easy access. Make sure the height suits your needs—12 to 24 inches is ideal for most gardeners.
Fill the bed with layers of organic material like sticks, leaves, and compost. Top it off with nutrient-rich soil to create the perfect environment for your plants. When planting, arrange taller crops along the back and smaller ones near the edges. This layout ensures every plant gets enough sunlight.
With a little planning, you’ll have a U-shaped raised garden bed that’s both practical and beautiful. It’s one of the best ideas for creating a productive and accessible garden space.
Spiral Herb Garden Configurations
Benefits of Spiral Raised Garden Beds
Spiral herb gardens are a fantastic way to combine functionality and beauty in your outdoor space. This unique design offers several advantages that make it a favorite among gardeners. Whether you're short on space or looking for something eye-catching, a spiral raised garden bed delivers on all fronts.
Advantage |
Description |
|---|---|
The structure has a small footprint, but delivers lots of accessible growing space. |
|
Microclimates |
The height of the spiral creates shade and sun zones. |
Thermal Mass |
The rock used in the spiral holds thermal mass - it keeps heat. |
Moisture Variation |
The soil on the top of the spiral remains drier, while the bottom will be more moist. |
Aesthetic Appeal |
They look beautiful, and are great garden conversation structures. |
The spiral shape allows you to grow a variety of herbs in a compact area. You can take advantage of the microclimates it creates. For example, plants that love the sun thrive at the top, while moisture-loving herbs do well at the base. Plus, the rocks used in the structure retain heat, keeping your plants cozy even on cooler nights. And let’s not forget—they look stunning! A spiral herb garden can easily become the centerpiece of your yard.
How to Build a Spiral Herb Garden
Building a spiral herb garden is a fun and inexpensive project you can tackle over a weekend. Here’s how you can create one:
Choose a Location: Pick a sunny spot in your yard. Most herbs love sunlight, so make sure the area gets at least six hours of direct light daily.
Mark the Spiral: Use a rope or garden hose to outline the spiral shape on the ground. Start from the center and work your way outward.
Build the Walls: Gather rocks, bricks, or other sturdy materials to construct the spiral walls. Stack them higher as you move toward the center to create the raised structure.
Fill with Soil: Add layers of soil, starting with a base of organic material like straw or leaves. Top it off with nutrient-rich soil to support healthy plant growth.
Plant Your Herbs: Arrange your herbs based on their needs. Place sun-loving herbs like rosemary and thyme at the top. Moisture-loving ones like parsley and chives do best near the bottom.
Here’s a list of herbs that work wonderfully in spiral garden designs:
Rosemary
Thyme
Sage
Parsley
Chives
Basil
Oregano
Cilantro
Chervil
Dill
With this setup, you’ll have a thriving herb garden that’s both practical and beautiful. It’s a great way to explore diy raised garden bed ideas while making the most of your space.
Modular Raised Garden Beds by Snugniture
Features of Modular Metal Raised Garden Beds
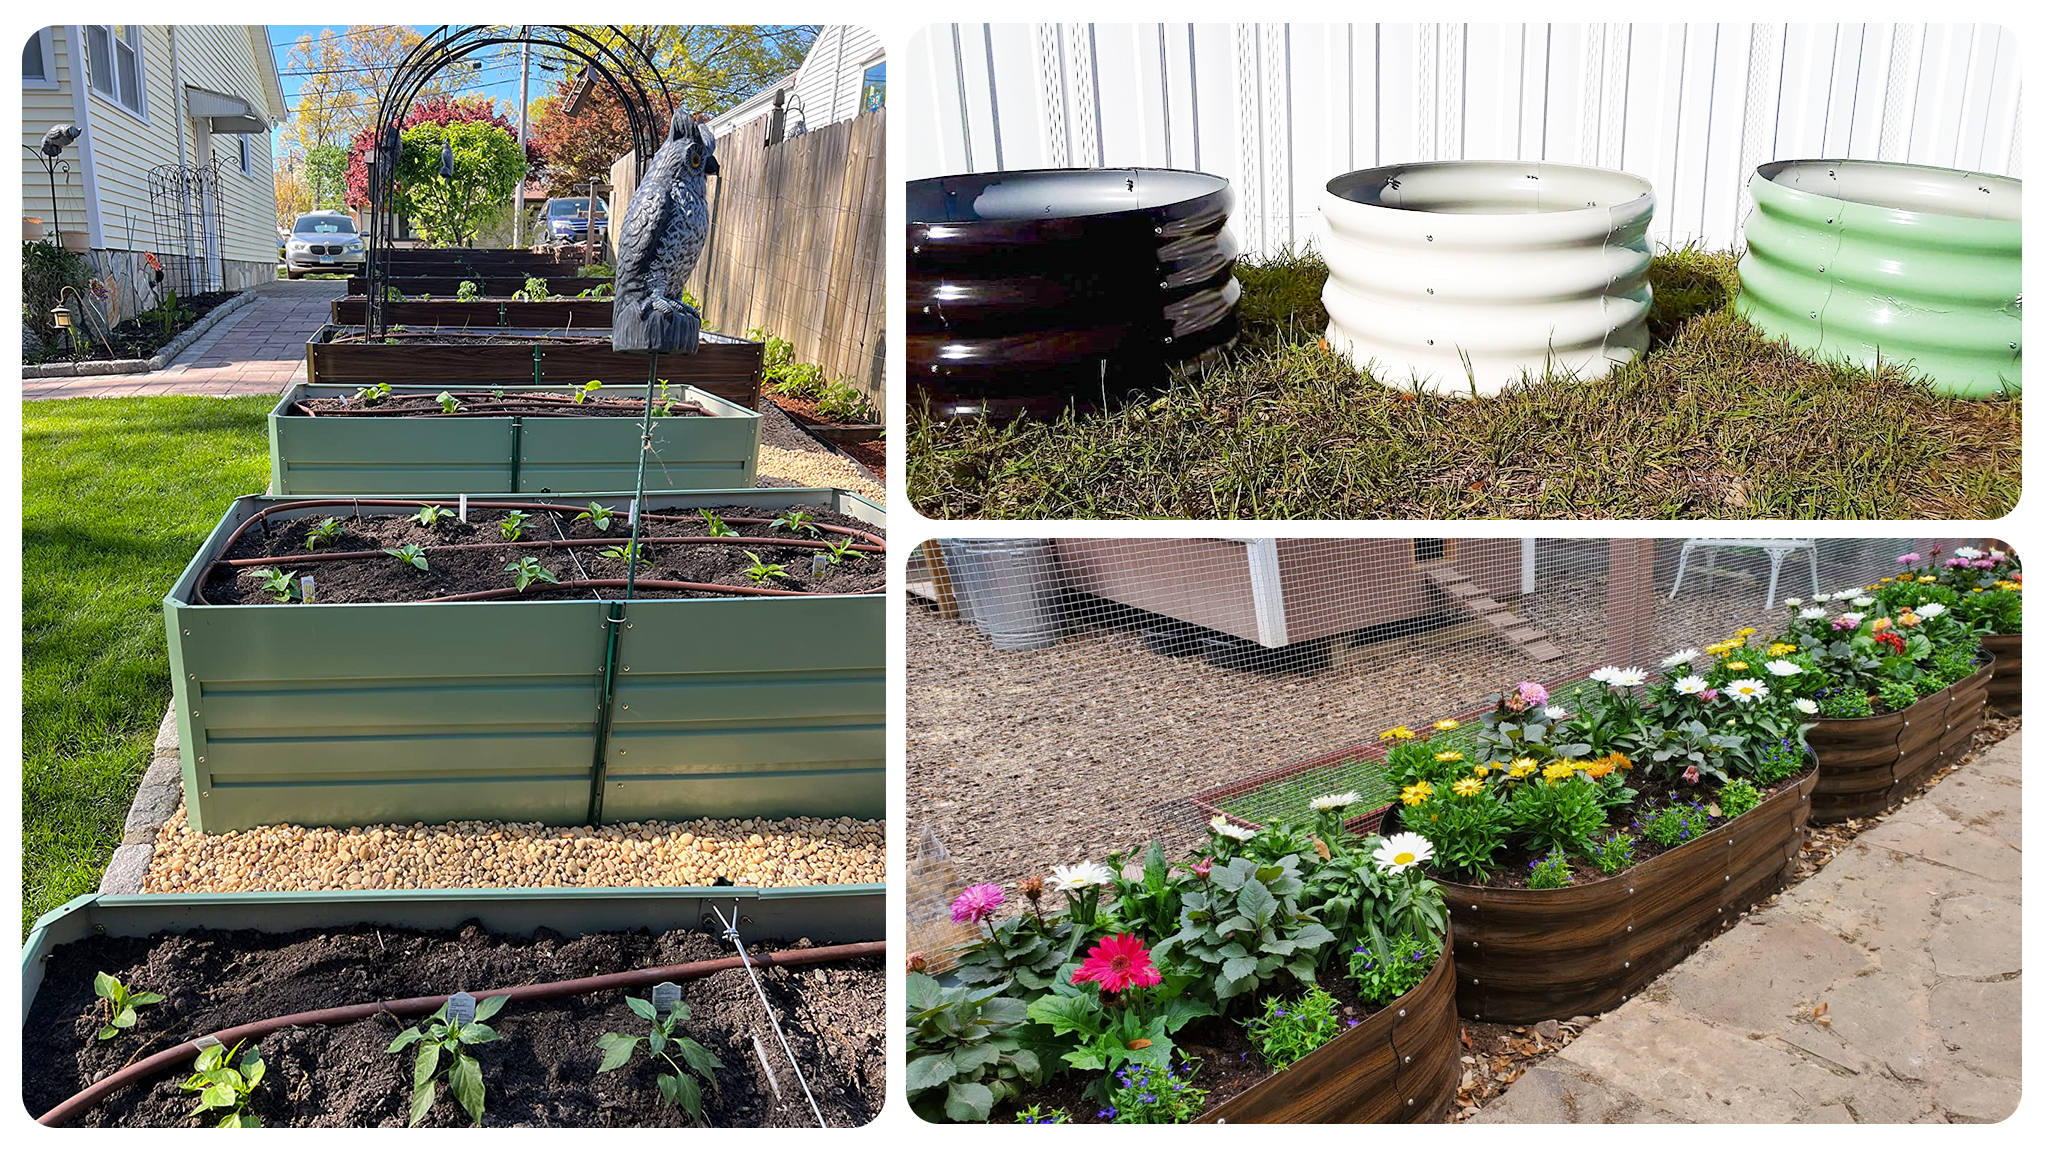
Snugniture’s Modular Metal Raised Garden Beds are a game-changer for gardeners of all skill levels. These raised garden beds are designed with durability, sustainability, and ease of use in mind. Made from eco-friendly, non-toxic materials, they’re safe for your plants and the environment. Plus, the corrosion-resistant metal ensures they’ll last for years, even in harsh weather conditions.
One standout feature is the variety of sizes and heights available. Whether you need a compact 12-inch bed for herbs or a taller 24-inch option for deep-rooted vegetables, there’s a perfect fit for your needs. The modular design also makes these beds incredibly versatile. You can create layouts that suit your space, whether it’s a small balcony or a sprawling backyard.
Another bonus? These raised garden beds come in stylish colors like Walnut, Pearly White, and Green. They don’t just serve a purpose—they also enhance the look of your outdoor space. And if you’re into sustainable gardening, you’ll love that Snugniture donates 1% of sales to tree-planting initiatives. It’s a win for your garden and the planet!
Customizing Modular Configurations for Your Space
The modular design of Snugniture’s raised garden beds gives you the freedom to get creative. You can mix and match components to build a layout that fits your unique gardening space. Whether you’re working with a tiny patio or a large yard, these beds adapt to your needs.
Here’s how modular designs make customization easy:
Interlocking components let you create configurations tailored to your space.
They work in various environments, from vertical gardening on balconies to sprawling setups in backyards.
You can combine pieces to match your aesthetic preferences and grow diverse plant varieties.
For example, if you’re short on space, stack the beds vertically to maximize your growing area. If you have a larger space, arrange them in creative shapes like L or U configurations. This flexibility makes them perfect for both beginners and experienced gardeners.
Looking for inexpensive diy ideas? These modular beds are easy to assemble and maintain, saving you time and money. With Snugniture, you can design a garden that’s as functional as it is beautiful.
In-Ground Hybrid Raised Garden Beds
Combining Raised and In-Ground Gardening
If you’re looking for a way to blend the best of both worlds, in-ground hybrid raised garden beds are a fantastic option. This configuration combines the structure of raised beds with the natural benefits of in-ground gardening. You get the improved drainage and soil control of a raised garden bed while still taking advantage of the earth’s natural nutrients and moisture retention.
This hybrid approach works especially well if you’re dealing with uneven terrain or poor soil quality. By raising part of the bed, you can create a level planting area while still connecting to the ground below. It’s also a great way to save on materials since you won’t need as much soil or wood to build the bed. Plus, it’s an inexpensive solution for gardeners who want to maximize their growing space without breaking the bank.
Tip: Use this setup to grow plants with deep roots, like carrots or potatoes, which thrive when they can access both the raised soil and the ground below.
Practical Tips for Hybrid Configurations
Ready to try this hybrid gardening method? Here are some practical tips to get you started:
Choose the Right Spot: Pick a location with good sunlight and natural drainage. Avoid areas prone to flooding.
Build a Partial Frame: Use wood, bricks, or stones to create a frame around the raised portion. Leave the bottom open to connect with the ground.
Layer Your Soil: Start with a base of organic material like leaves or straw. Add a mix of compost and topsoil to create a nutrient-rich environment.
Plan Your Planting: Place deep-rooted plants in the hybrid section and shallow-rooted ones in the fully raised area. This ensures every plant gets what it needs.
Maintain Regularly: Check for weeds and pests. Since part of the bed connects to the ground, you might need to weed more often.
This hybrid design gives you the flexibility to grow a variety of plants while keeping costs low. It’s one of the most versatile raised garden bed ideas out there, perfect for both beginners and experienced gardeners.
Multi-Material Raised Garden Bed Ideas
Using Different Materials for Unique Designs
When it comes to raised garden beds, the materials you choose can make a big difference in both style and durability. Mixing materials is a great way to create a unique look while also improving the functionality of your garden. You don’t have to stick to just one type of material—there are plenty of options to explore.
Here are some popular materials you can use:
Wood: A classic choice that’s affordable and easy to work with. However, it may need replacement over time due to rot.
Composite Woodcrete: A durable and rot-resistant option. It costs more upfront but lasts longer, making it a smart investment.
Metal: Known for its durability, metal can withstand harsh weather. Keep in mind, though, it might affect soil temperature.
Plastic: The cheapest option, but it’s less visually appealing and not the most eco-friendly choice.
Using recycled materials is another fantastic idea. For example, recycled plastic reduces landfill waste and provides a durable, eco-friendly option for your raised garden bed. Plus, it’s 100% recyclable, so you can repurpose it when it’s no longer needed.
Creative Combinations for Raised Garden Beds
Combining different materials can take your garden to the next level. Mixing wood and metal, for instance, gives you a modern yet rustic look. You could use wood for the frame and metal panels for added durability. This combination not only looks great but also extends the life of your raised bed.
If you’re into diy projects, try pairing recycled plastic with composite woodcrete. This blend offers a sustainable and long-lasting solution while keeping costs low. You can also experiment with stone or bricks for the edges to add a decorative touch.
By mixing materials, you can create raised garden beds that are both functional and stylish. Whether you’re working with a small space or a large yard, these ideas let you customize your garden to fit your needs and personality.
Circular Raised Garden Beds
Benefits of Circular Configurations
Circular raised garden beds are a fantastic way to add charm and functionality to your outdoor space. Their unique shape not only looks great but also makes gardening more efficient. You can reach every part of the bed without stepping on the soil, which keeps your plants healthy and your garden neat.
One of the biggest perks of circular designs is how they maximize planting space. The curved edges create more room for your plants compared to traditional rectangular beds. This makes them perfect for small yards or gardens where space is limited. Plus, they’re ideal for creating focal points in your landscape. A circular raised garden bed can turn a plain yard into a stunning centerpiece.
These beds also work well for specific planting arrangements. Spiral gardens, for example, increase usable planting areas while adding a visually striking element to your garden. You can build them with materials like stone, brick, or wood to match your style. If you’re growing herbs or small vegetables, a keyhole design with a central access path makes it easy to tend to your plants.
Circular configurations are not just practical—they’re also versatile. Whether you’re looking for diy ideas or a professional setup, these beds offer endless possibilities for creativity and productivity.
How to Design a Circular Raised Garden Bed
Designing a circular raised garden bed is easier than you might think. Start by picking a sunny spot in your yard. Most plants thrive with at least six hours of sunlight daily. Use a rope or garden hose to outline the circle on the ground. This helps you visualize the size and shape before you start building.
Next, choose your materials. Stones, bricks, or wood are great options. Stack them to create walls about 12-24 inches high. If you want to get creative, consider adding a spiral or keyhole feature. A spiral design lets you grow plants at different heights, while a keyhole layout gives you easy access to the center.
Once the structure is ready, fill it with soil. Start with a base layer of organic material like leaves or straw for drainage. Add compost and topsoil to create a nutrient-rich environment. Finally, plan your planting. Place sun-loving plants like rosemary or thyme at the top of a spiral. Moisture-loving ones like parsley do better near the bottom.
With a little effort, you’ll have a circular raised garden bed that’s both beautiful and functional. It’s a great way to explore new gardening ideas while making the most of your space.
Elevated Table-Style Raised Garden Beds
Accessibility and Convenience of Elevated Beds
Elevated table-style raised garden beds are a fantastic option if you want to make gardening easier and more enjoyable. These beds are designed to sit at waist height, so you don’t have to bend or kneel while tending to your plants. This feature is especially helpful for elderly gardeners or anyone with mobility challenges. You can focus on planting, watering, and harvesting without worrying about back pain or discomfort.
Another great benefit is how these beds keep your garden neat and organized. The elevated design prevents soil from spilling onto your patio or yard. It also keeps pests like rabbits and ground insects away from your plants. You’ll spend less time dealing with weeds and more time enjoying your garden.
These raised garden beds are perfect for small spaces too. You can place them on a balcony, deck, or even indoors with proper drainage. Their compact size makes them ideal for growing herbs, flowers, or vegetables in areas where space is limited. With elevated beds, you can bring your gardening ideas to life without needing a large yard.
Building Elevated Raised Garden Beds on a Budget
Creating elevated raised garden beds doesn’t have to break the bank. You can use affordable materials and even repurpose items you already have at home. Here are some budget-friendly ideas to get you started:
Use thicker twigs and branches to outline the bed.
Stack larger rocks for a rustic and natural look.
Repurpose wooden pallets into vertical gardens or raised beds.
Transform old furniture like cabinets or toy boxes into raised beds.
Upcycle pavers or stones from landscaping supply stores.
Cinder blocks are another inexpensive option. They cost just $2 to $3 each at most home improvement stores. You can stack them to create a sturdy and affordable frame for your garden bed.
If you prefer a step-by-step approach, try this:
Collect bricks from a friend or neighbor who no longer needs them.
Dry stack the bricks to form the outline of your raised garden bed.
Repurpose an old cabinet by removing the doors and painting it for a fresh look.
When choosing materials, consider their durability and maintenance needs. For example, untreated wood may last 5-10 years but requires regular replacement. Metal beds are more durable but need proper ventilation to avoid overheating. Composite materials or bricks can last for decades with minimal upkeep.
Material |
Lifespan |
Maintenance Requirements |
|---|---|---|
Untreated Wood |
5-10 years |
Regular replacement due to decay |
Treated Wood |
Longer than untreated |
Monitor for chemical leaching |
Metal Beds |
Durable |
Ensure proper ventilation to avoid overheating |
Composite/Bricks |
Decades |
Minimal maintenance required |
With a little creativity and planning, you can build a raised garden bed that’s both functional and affordable. It’s a great way to explore diy gardening while staying within your budget.
Raised garden beds open up endless possibilities for creativity and functionality in your garden. By experimenting with creative configurations, you can find the perfect fit for your space and gardening goals. Whether you’re drawn to tiered terraces, keyhole designs, or elevated beds, each idea offers unique benefits. For example:
Tiers add visual appeal and allow for varied plant types.
Keyhole designs make plant maintenance easier with central access.
Elevated beds improve accessibility and reduce strain.
Vertical stacking saves space while supporting root growth.
If you’re looking for inexpensive raised garden bed ideas, try curved or nested designs to optimize space and blend into your landscape. These configurations not only enhance your garden’s functionality but also reflect your personal style.
Want to learn more? Explore resources that guide you through planning, building, and maintaining raised garden beds. From selecting materials to creating diy projects, these tools can help you bring your vision to life. With so many raised garden bed ideas to choose from, your garden can become a space that’s both productive and beautiful.
🌱 Tip: Share your own creative configurations with fellow gardeners or look for inspiration in gardening communities. You might discover new ways to make your garden thrive!


