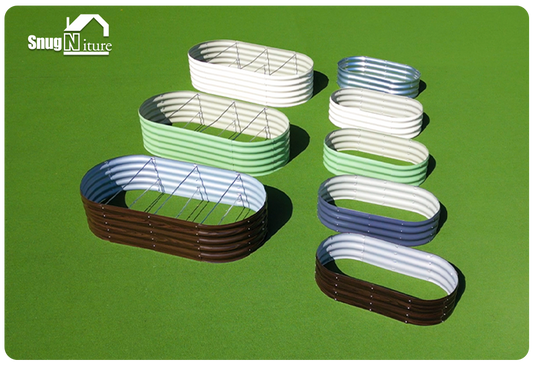
Setting Up Your First SnugNiture: Your Step-by-Step Guide
Preparation: Setting the Stage for Success
Getting ready to assemble your SnugNiture raised garden bed is just as important as the assembly itself. A little preparation goes a long way in transforming your outdoor space into a thriving garden. Let’s dive into the essentials to set you up for success.
Tools and Materials Checklist
Tools included in the SnugNiture kit
Your SnugNiture kit comes with everything you need to get started. Inside, you’ll find:
-
Pre-cut modular panels for the raised garden bed.
-
Screws and nuts for secure assembly.
-
A handy bolt tightener to make the process smooth.
Choosing the Perfect Location
Importance of sunlight and drainage
Picking the right spot for your raised garden bed is key to healthy plants. Look for a location that gets at least six hours of direct sunlight daily. This ensures your vegetables and flowers grow strong. Also, choose a spot with good drainage to prevent water from pooling, which can harm roots.
Preparing the ground for assembly
Before you start building, prep the ground to create a solid foundation:
-
Loosen any compacted soil to improve drainage.
-
If the ground slopes, dig a shallow trench to level the first board.
-
Use a level to double-check that everything is straight before moving forward.
Organizing Your Components
Verifying all parts in the package
Before you begin, take a moment to check that all parts are included in your SnugNiture kit. Missing pieces can slow you down, so it’s better to catch this early.
Arranging components for easy access
Lay out all the parts in the order you’ll need them. This simple step saves time and reduces errors during assembly. Plus, it keeps your workspace tidy, making the process more enjoyable.
By following these steps, you’ll be well on your way to creating a beautiful raised garden bed. With the right tools, a great location, and organized components, you’re setting the stage for a smooth and rewarding assembly experience.
Step-by-Step Guide to Assembling Your SnugNiture
Step 1: Unboxing and Preparing
Safely unbox your SnugNiture kit
Start by carefully opening your SnugNiture package. Use scissors or a box cutter, but avoid cutting too deep to prevent damaging the components inside. Once unboxed, remove all items and place them on a flat surface. This ensures nothing gets misplaced during assembly.
Lay out all parts in assembly order
Organize the parts in the order you’ll need them. Group similar items, like screws and washers, together. Lay the modular panels flat and arrange them by size. This step makes the process smoother and helps you avoid unnecessary backtracking.
Step 2: Building the Foundation
Assembling the base structure
The foundation is the backbone of your raised garden bed. To ensure stability, follow these key considerations:
|
Key Consideration |
Description |
|---|---|
|
Material Choice |
Your choice of material should align with your garden’s aesthetic, budget, and maintenance level. A well-constructed raised bed enhances soil control, drainage, and weed management. |
|
Location |
Avoid low-lying areas to prevent water pooling. Elevated sites promote proper drainage, ensuring healthy plant roots while requiring a stable base. |
|
Soil Composition |
The type of soil is crucial for plant health. Organic materials create nutrient-rich, well-draining soil essential for raised beds. |
Position the base panels on your prepared ground. Use a level to check alignment and adjust as needed. This step ensures your raised garden bed remains sturdy and balanced.
Ensuring stability and alignment
Secure the base panels using the screws, washers, and nuts provided in your kit. Tighten them just enough to hold the structure together without over-tightening. Double-check the alignment with a level to keep everything straight. A stable foundation sets the stage for a successful build.
Step 3: Constructing the Raised Garden Bed
Connecting modular panels securely
Now it’s time to assemble the walls of your raised garden bed. Follow these steps for a secure fit:
-
Drill holes in each marked location, ensuring at least one hole per board.
-
Attach framing angles using hex screws, washers, and nuts to create panels.
-
Line up new boards with existing panels, mark holes, and drill.
-
Secure boards to framing angles with screws, washers, and nuts to complete corners.
-
Check angles for flushness and 90 degrees using a framing square.
6. Attach the final panel and tighten all bolts once satisfied with the structure.
Double-checking for gaps or misalignments
Inspect the assembled panels for any gaps or uneven edges. Tighten loose screws and adjust panels to eliminate misalignments. A snug fit ensures your raised garden bed is durable and ready for planting.
By following this step-by-step guide to success, you’ll have a sturdy and beautiful raised garden bed ready to transform your outdoor space.
Step 4: Adding the Finishing Touches
Tightening screws and securing edges
You’re almost there! Now it’s time to make sure everything is snug and secure. Grab your bolt tightener or drill and go over each screw in your raised garden bed. Tighten them firmly, but don’t overdo it. Over-tightening can strip the screws or damage the panels.
Pay special attention to the corners and edges. These areas take the most stress, so they need to be extra secure. Run your hand along the edges to check for any sharp spots or uneven surfaces. If you find any, smooth them out with a file or sandpaper. This step ensures your garden bed is safe to handle and looks polished.
Pro Tip: Work systematically. Start at one corner and move around the entire structure. This way, you won’t miss any screws or edges.
Final inspection for safety and durability
Before you call it a day, give your raised garden bed a thorough once-over. Check that all panels are aligned and there are no gaps between them. Misalignments can weaken the structure and affect its durability.
Next, test the stability of your garden bed. Gently push on the sides to ensure it doesn’t wobble. If it does, tighten the screws a bit more or adjust the alignment. A stable raised garden bed will last longer and keep your plants safe.
Finally, step back and admire your work. Your Snugniture raised garden bed is now ready to transform your outdoor space into a thriving garden. Whether you’re growing vegetables, flowers, or herbs, this sturdy and stylish addition will elevate your gardening experience.
Note: If you plan to move your garden bed later, keep the assembly manual handy. It’ll make disassembly and reassembly a breeze.
Troubleshooting and Tips for Raised Garden Beds for Beginners
Even with the best preparation, you might run into a few hiccups while setting up your raised garden bed. Don’t worry—these beginner tips will help you troubleshoot common issues and avoid mistakes.
Common Issues and How to Fix Them
Missing or damaged parts
If you notice any missing or damaged parts in your Snugniture kit, don’t panic. Start by double-checking the packaging. Sometimes smaller items like screws or washers can hide in the corners of the box. If something is truly missing, reach out to Snugniture’s customer support for a quick resolution. They’re always ready to help you get back on track.
Misaligned panels or loose screws
Misaligned panels can make your raised garden bed unstable. To fix this, loosen the screws slightly and realign the panels. Use a level to ensure everything is straight before tightening the screws again. For loose screws, double-check that you’re using the correct hardware and tighten them securely without overdoing it.
Pro Tips for a Smooth Setup
Setting up raised garden beds for beginners doesn’t have to be stressful. These tips will make the process easy and enjoyable:
-
Place your raised garden bed in a flat area for proper drainage.
-
Choose a spot that gets 6-8 hours of sunlight daily.
-
Keep the bed close to a water source to save time and effort.
-
Use organic compost to create nutrient-rich soil for your plants.
-
For larger beds, work with a partner to make assembly easier.
Beginner Tip: Keep the width of your raised garden bed under 3 feet. This ensures you can easily reach the center from either side.
Mistakes to Avoid During Assembly
Over-tightening screws
It’s tempting to tighten screws as much as possible, but over-tightening can damage the panels or strip the screws. Use a torque wrench or a similar tool to apply just the right amount of pressure. This keeps your raised garden bed sturdy without compromising its durability.
Skipping steps in the manual
Skipping steps might seem like a time-saver, but it often leads to mistakes that take longer to fix. Follow the manual step by step, even if you think you know what’s next. Trust the process—it’s designed to make assembly smooth and error-free.
By keeping these beginner tips in mind, you’ll avoid common pitfalls and enjoy a hassle-free setup. Your raised garden bed will be ready to support a thriving garden in no time!
Maintenance and Care for Your SnugNiture Raised Garden Bed
Proper maintenance keeps your SnugNiture raised garden bed looking great and functioning well for years. With a little care, you can protect your investment and enjoy all the raised garden bed benefits.
Cleaning and Protecting Your Garden Bed
Best practices for cleaning galvanized steel
Cleaning your raised garden bed is simple and ensures it stays in top condition. Follow these steps:
-
Remove Debris and Weeds: Clear away leaves, weeds, and other debris from the bed.
-
Weed Control: Use a hand trowel to remove stubborn weeds, including their roots.
-
Scrub the Metal: Use a wire brush or scrub brush with mild soap or vinegar to clean dirt and rust.
-
Paint (Optional): Apply rust-resistant paint to prevent future rust.
-
Replenish the Soil: Add fresh compost or soil to keep your plants healthy.
-
Mulch: Spread organic mulch to retain moisture and reduce weed growth.
These steps not only keep your garden bed clean but also extend its lifespan.
Avoiding scratches and corrosion
Galvanized steel is durable, but scratches can lead to rust. Avoid using sharp tools directly on the metal. If you notice scratches, cover them with rust-resistant paint. Regular cleaning also prevents corrosion by removing moisture-trapping dirt.
Long-Term Maintenance Tips
Periodically check and tighten screws
Over time, screws may loosen due to weather or use. Inspect your raised garden bed every few months. Tighten any loose screws to maintain stability. This quick check keeps your garden bed sturdy and safe.
Protecting your garden bed from extreme weather
Extreme weather can challenge even the toughest raised garden beds. Here’s how to protect yours:
-
Install Frames: Add a PVC or metal frame to shield plants from wind and pests.
-
Use Coverings: Protect plants with shade cloth, fine netting, or polyethylene sheets. These materials guard against frost, debris, and harsh sunlight.
-
Watering Practices: Use a heavy-duty hose for consistent watering, especially during freezing temperatures.
These steps ensure your garden thrives, no matter the weather.
By following these tips, your SnugNiture raised garden bed will remain a durable and beautiful centerpiece in your garden for years to come.

